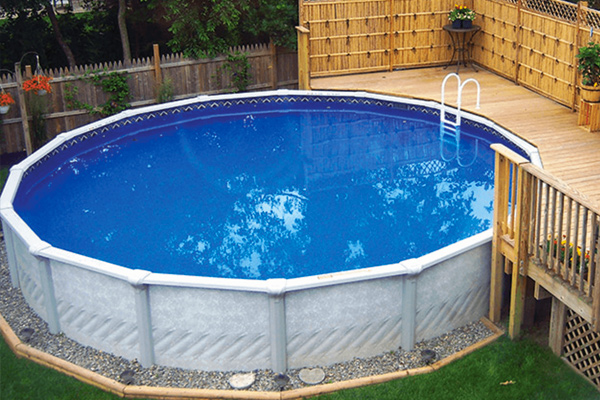
Follow These Steps To Open Your Above Ground Pool
If you have any concerns about opening your above ground pool then please feel free to contact us for free professional advice. If your unsure of trying this yourself after reading these steps then we recommend having your pool opened by trained professionals to ensure that it is done properly.
* KB Pools Tip:
If you’re concerned about opening your pool to cloudy water then here’s a pro tip from the Krossber Brothers. When you closed your pool you probably added chlorine or other closing chemicals back in the fall. Depending on what you added, the most popular chemical that kills and prevents algae (chlorine) is most likely depleted by now. What most pool owners don’t know is that algae growth slows down significantly once the water temperature drops below sixty degrees. By the time you’re ready to open your pool we usually have had a decent thaw or two in the months leading up to spring. What most pool owners don’t realize is that their pools turned green from algae growth back during those thaws. We recommend adding some liquid chlorine under your pool cover during a thaw to help carry your clean pool into spring with a much higher chance of opening it just as clean as you closed it. This can be done by opening a corner of your pool or through the skimmer with a funnel. Just make sure not to pour it all in one spot near your liner or this could cause premature wear and tear. Good luck!
Step 1) Removing Your Winter Cover
The first step to opening your above ground pool is to remove the winter cover. You might find that the cover has accumulated excess water and debris on it. Whatever you do try not to “dump the cover” into the pool with this excess water and debris as it will make the pool clean up process much more labor intensive. Our recommendation is to use a submersible pump to remove the water and use your skimmer net or deep leaf rake to scoop the debris out. If your going to use a submersible pump its a good idea to either stick your hose under the cover to help fill the pool as it pumps the cover off or keep a close eye on the pump to make sure that it is not pulling water through your cover and draining your pool further down. Once the cover is free of water and debris go ahead and loosen your cable/ winch and pull the cover to one side of the pool. Once the cover is removed it’s a good idea to lay it out on the lawn, clean, and then treat the cover with “Stow Away” to prevent premature “dry rot” of the cover once it’s stored for the season.
Step 2) Remove Return Plug ( and skimmer plate if used)
If you used a winter skimmer plate then move on to step 3 and come back to this step afterwords as the water level in your pool is most likely already above the skimmer & return. If you did not use a skimmer plate then the next step is to remove your return plug from the return outlet of your pool. You may have used either a rubber plug or threaded return plug when you winterized the pool. Remove this plug and install your return fitting with directional eyeball. It’s best to position your return directional so that it points down and to the right of the pool. This will help with maximizing proper water circulation in your pool.
Step 3) Re-Connect Your Pump & Filter
Now that your cover is off, skimmer open, and returns in, it’s time to un-winterize your filter system and equipment. Re-connect your lines and tighten any unions that you might have. Be sure to lubricate any O-rings before connecting lines and unions. It’s also good to lubricate any threaded plugs, caps, and your pump lid as well. (Do not use petroleum based lubricants as they will prematurely wear out your O-rings. We use a Teflon based Magic Lube that works great and can be found on our website as well as in store.) Install your pressure gauge but be careful not to over-tighten when you thread it into your filter head.Your hose connections should go as follows: Connect the hose from the bottom of your skimmer to the front of your pump. Then connect your next hose (usually clear) from the top of your pump to the port on your filter marked “pump”. Now you can connect your return hose from the connection on the filter marked “return” to the return fitting on your pool. Once your lines are all connected go ahead and start filling your pool back up if you have not already started to fill it.
*Tip for sand filter owners- If you’re pool is green or you suspect that the bottom has debris on it then fill your pool right to the top of your skimmer. This helps so that you can vacuum your pool on the “waste” setting to remove the algae and debris and not have to worry about adding water again. This also bi-passes the filter so that you will not have anything getting back into your pool.
Equipment Checklist:
Step 4) Start Your Filter System
Now it’s time to turn your filter system on. If you own a sand filter then it’s a good idea to backwash your sand first thing to clean out any debris or worn sand from last season. Make sure there are no leaks at your hose connections and set your filter to backwash. Now you can turn on the pump and follow your standard backwash procedure. Make sure to “rinse” the sand after back washing to reset the sand and flush the filter. (Be sure to always shut the pump off whenever you move your handle to change the settings so that you do not damage your multi-port valve.) Once you have successfully back washed and rinsed your filter now you can set it to run on the “filter” position and move on to your final step.
Step 5) Vacuum & Treat Your Pool
Well now your pool filter is running, the water is circulating, and you can almost hear the happy summer splashing. But first you have one last step. This is either the easiest, or most dreaded step depending on how you closed the pool. Be sure to scoop and vacuum all debris from the pool before adding your water care products. Adding a bunch of shock before getting the debris out will make things worse by turning all that debris into mush. Once you have successfully cleaned the pool, scoop a sample and come see us for your free computerized water analysis. If you live too far from our store then be sure to properly test and balance the pool before entering the water. After this final step is complete strap on the flippers, fasten on your goggles, and enjoy the fruit of your efforts. Congratulations, your pool is now open
We hope these steps make it easy for you to get your above ground pool up and running this season. If you have any questions please don’t hesitate to ask. Feel free to leave us comments and feedback.
Thank You!
95 Brands Connected
Green Mountain Grills
Harman Stoves
Mendota Hearth
Grizzly Coolers
Mallin Furniture
Firedisc
Legacy Billiards
Embassy Pools
Sucklebusters
Croix Valley Foods
American Made Grills
Presidential Billiards
Imperial USA
Vogue Pools
Doughboy Pools
DCS Grills
Broil King
Radiant Pools
Latham Pools
Leisure Pools
Legacy Edition Pools
SpaGuard
Swim Above Ground
Hot Spring Spas
Covana
SilkBalance
Bioguard
Baquacil
ProTeam® Water Care
Poolife
Spazazz
Big Green Egg
Leisure Concepts
Caldera Spas
A and B Accessories
Yeti Coolers
Traeger Grills
Coverstar Products, Inc.
Visscher Specialty Products
Infinity Massage Chairs
Kozy Heat Fireplaces
Saber Grills
Primo Grills
Natural Chemistry
Freeflow Spas
Nature2
Maytronics
Baqua Spa
Pentair
Fantasy Spas
Hayward
GLB
Applied Biochemists
Aquasilk
Ultima
Quantum Biochemical
Leisure Time
Rendézvous Spa Specialties
Splash SuperPools
Endless Pools
Polaris
Kona Pools
Pit Boss Grills
Spa Scents
Napoleon
inSPAration
Bull BBQ
Louisiana Grills
Lawrason's Inc.
Carvin Pools
Astria Fireplaces
IronStrike
VERMONT CASTINGS
Hearthstone
Finnleo Saunas
Zodiac
Brilliance For Spas
Spa Marvel
Cover Valet
Spa Pure
Aqua Finesse
Twin Eagles Grills
Aquabot
American Fyre Designs
Blaze Grills
Sharkline Pools
End2End Swim Spa Cover
Brunswick Billiards
Weber Grills
Olhausen Billiards
Cal Flame
Delta Heat
Heat & Glo
Fire Magic Grills
Lion Premium Grills
5 Brands Connected
Hot Spring Spas
Caldera Spas
Freeflow Spas
Fantasy Spas
Endless Pools